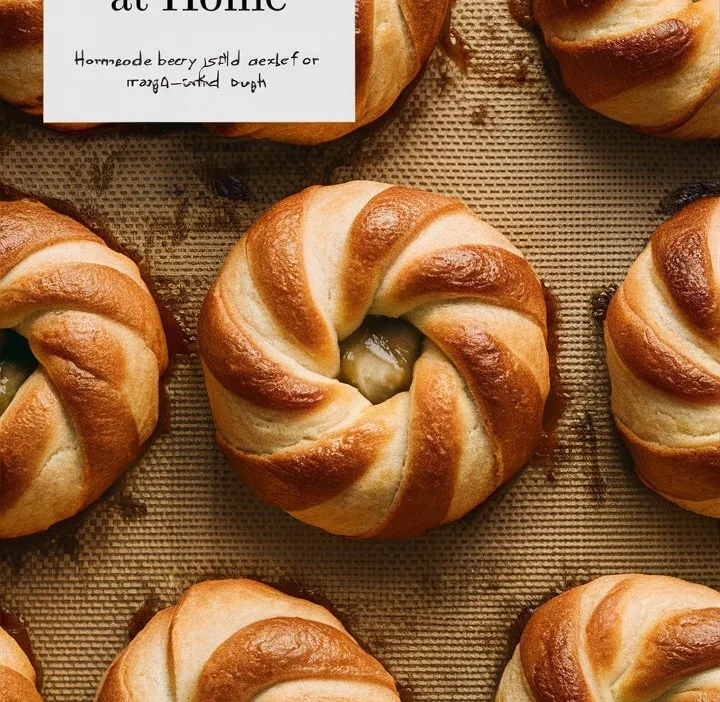
There’s something irresistibly comforting about the aroma of warm pastries wafting through your kitchen. Among the world’s most beloved baked goods, the Cheesecake Danish stands tall—flaky, creamy, and delicately sweet. Whether you’re a weekend baker or an ambitious home cook, mastering this delightful pastry can elevate your culinary skills and bring smiles to everyone at the table.
In this comprehensive guide, we’ll walk you through everything you need to know about making the perfect Cheesecake Danish—from the ingredients and methods to expert tips, flavor variations, troubleshooting, and make-ahead options. Let’s dive into a sweet journey of golden crusts and luscious cream cheese centers.
Sorry Generator
1. What Is a Cheesecake Danish?
A Cheesecake Danish is a pastry that combines the rich, creamy filling of cheesecake with the flaky, buttery layers of Danish dough. Traditionally made using yeasted laminated dough, the modern home cook version often uses puff pastry to save time while maintaining texture and taste.
The filling is made with sweetened cream cheese and flavored with vanilla or lemon, then topped with fruit, glaze, or enjoyed as is. It’s commonly served as a breakfast pastry, brunch treat, or elegant dessert.
2. Why You’ll Love This Recipe
This isn’t just any dessert—this is a stress-free, bakery-style pastry made right in your kitchen. Here’s why it’s a favorite among food lovers:
- Quick to Make: Using pre-made puff pastry cuts down prep time.
- Customizable: Add your favorite fruits, nuts, or spices.
- Impressive: It looks professional but requires beginner-level skills.
- Kid-Friendly and Crowd-Pleasing: Loved by adults and children alike.
3. Ingredients Breakdown
Let’s take a closer look at what you’ll need and why each component matters.
For the Pastry:
- Puff Pastry Sheets (2 sheets)
Store-bought frozen puff pastry is a convenient choice. It bakes into golden, crisp layers that are perfect for encasing creamy fillings.
For the Cheesecake Filling:
- Cream Cheese (8 oz / 225g, softened)
Use full-fat cream cheese for a rich and smooth texture. Low-fat versions may result in a thinner, less flavorful filling. - Granulated Sugar (⅓ cup)
Sweetens the cheese just enough without overwhelming it. - Vanilla Extract (1 tsp)
Adds depth and warmth to the cream cheese mixture. - Egg Yolk (1 yolk only)
Enriches and helps bind the filling. - Lemon Zest (optional, 1 tsp)
For a hint of brightness that balances the sweetness.
For the Glaze:
- Powdered Sugar (½ cup)
Also called icing sugar, it makes a silky glaze when mixed with liquid. - Milk or Water (1–2 tbsp)
Adjust for your preferred glaze consistency.
4. Step-by-Step Instructions
Follow these foolproof steps to create bakery-worthy Cheesecake Danishes at home.
Step 1: Preheat and Prepare
- Preheat your oven to 375°F (190°C).
- Line a large baking sheet with parchment paper or a silicone mat.
Step 2: Thaw and Roll Out the Puff Pastry
- If using frozen pastry, thaw it according to the package instructions.
- Lightly flour your surface and gently roll out each sheet to smooth seams.
Step 3: Cut the Dough
- Cut each puff pastry sheet into 4 squares (for larger Danishes) or 6 squares (for medium-sized portions).
Step 4: Prepare the Cream Cheese Filling
- In a medium bowl, beat together the softened cream cheese, sugar, vanilla, lemon zest, and egg yolk until smooth and creamy.
- Transfer the filling to a piping bag or use a spoon.
Step 5: Assemble the Danishes
- Place about 1 tablespoon of the cream cheese mixture in the center of each pastry square.
- Fold the corners inward and pinch gently to seal, or leave them open for a square-style look.
Step 6: Bake
- Transfer the pastries to the lined sheet, spacing them evenly.
- Bake for 20–25 minutes, or until the pastry is golden brown and puffed up.
Step 7: Make the Glaze
- While the Danishes cool, mix powdered sugar with a little milk or water until it forms a smooth drizzle.
Step 8: Glaze and Serve
- Once slightly cooled, drizzle each Danish with icing. Serve warm or room temperature.
5. Expert Tips for Flaky, Flavorful Danishes
- Keep It Cold: Puff pastry performs best when cold. Work quickly, and chill assembled Danishes for 10 minutes before baking if needed.
- Don’t Overfill: Overfilling can cause the centers to spill out during baking.
- Even Spacing: Give Danishes enough space on the baking sheet to puff up properly.
- Use Quality Ingredients: Real vanilla extract and full-fat cream cheese make a noticeable difference.
6. Common Mistakes to Avoid
Even simple recipes can go wrong. Avoid these errors:
- Skipping Egg Wash: Without brushing with egg yolk or milk, the pastries won’t brown nicely.
- Using Over-thawed Pastry: Too-warm dough gets sticky and doesn’t rise well.
- Rushing the Cooling Process: Let Danishes cool slightly before glazing, or the icing will melt off completely.
7. Flavor Variations You Must Try
1. Berry Cheesecake Danish
Top the cream cheese filling with a few fresh raspberries, blueberries, or sliced strawberries before baking.
2. Nutella Cheesecake Danish
Swirl a spoonful of Nutella into the cream cheese filling for a rich, chocolatey twist.
3. Apple Cinnamon Cheesecake Danish
Add a spoonful of spiced apple compote on top of the filling for a fall-inspired version.
4. Lemon Curd Danish
Replace the vanilla extract with lemon juice and top the filling with a dollop of lemon curd.
5. Savory Danish Option
Skip the sugar and vanilla, then mix cream cheese with herbs and garlic. Add sun-dried tomatoes or olives for a savory brunch pastry.
8. Make-Ahead and Storage Guide
Make-Ahead Options:
- Filling: Can be made 2 days in advance and stored in the fridge.
- Unbaked Danishes: Assemble and refrigerate overnight, then bake fresh in the morning.
Storage:
- Room Temperature: Best consumed the day they’re made.
- Refrigerator: Store leftovers in an airtight container for up to 3 days.
- Freezing: Wrap individually in plastic and store for up to 3 months.
Reheating:
- Bake at 350°F (175°C) for 10–12 minutes. Avoid microwaving as it softens the pastry.
9. Serving Suggestions
Cheesecake Danishes are versatile. Here are a few ideas for serving:
- Brunch Board: Pair with fresh fruit, mini muffins, and brewed coffee.
- Afternoon Tea: Serve with chamomile or Earl Grey tea for a luxurious treat.
- Dessert Plate: Add a scoop of vanilla bean ice cream and a drizzle of raspberry coulis.
10. Nutritional Information (Approximate per serving)
| Component | Amount |
|---|---|
| Calories | 280 kcal |
| Carbohydrates | 24g |
| Sugars | 10g |
| Protein | 4g |
| Fat | 18g |
| Saturated Fat | 10g |
| Sodium | 210mg |
Note: Nutritional values vary based on brand of ingredients and portion size.
11. Frequently Asked Questions
Q1: Can I make these without puff pastry?
Yes. If you’re experienced with yeast dough, try a classic Danish pastry dough. It’s more labor-intensive but authentic.
Q2: What if I don’t have cream cheese?
You can substitute mascarpone or a ricotta-cream cheese blend for a similar creamy texture.
Q3: How do I keep the centers from collapsing?
Avoid overfilling, and let the pastries cool slightly before moving them. They will naturally sink a bit but should still hold shape.
Q4: Can I add jam to the filling?
Absolutely! Add a teaspoon of fruit preserves on top of the cream cheese mixture before baking.
12. Final Thoughts
Creating the perfect Cheesecake Danish doesn’t require bakery-level expertise. With the right ingredients, a bit of technique, and a dash of creativity, you can prepare this crowd-pleasing pastry right from the comfort of your kitchen.
Whether you’re baking for a special brunch, sharing at a potluck, or just treating yourself, this Cheesecake Danish recipe offers everything you could want in a dessert: flaky layers, creamy filling, and sweet satisfaction.
So grab your apron, preheat your oven, and discover just how magical homemade pastries can be.


